Secure Shell (SSH) is widely used for communicating with remote servers. SSH command is usually used in Linux and Unix-based systems. But we can use SSH in Windows with PowerShell.
Powershell is a command-line shell for scripting developed by the Microsoft team. As a powerful tool, you can install and integrate many services into PowerShell. You can use SSH in PowerShell by installing OpenSSH or with WSL (Linux Subsystem for Windows). You can connect to the remote server, transfer files and execute the command line directly in PowerShell.
In this blog post, I’ll discuss two different methods to use SSH in Windows PowerShell.
Table of Contents
1. Installing and Configuring OpenSSH in Powershell
OpenSSH is the most popular SSH client for connecting remote servers. Although It is the default SSH client in Linux and macOS, it does not provide an official client for the Windows operating system. But you can use SSH in Windows Powershell, all thanks to the PowerShell team, who tweak OpenSSH for Windows.
Download and Install OpenSSH
To use OpenSSH in PowerShell, download it from the Powershell GitHub release (https://github.com/PowerShell/Win32-OpenSSH/releases).
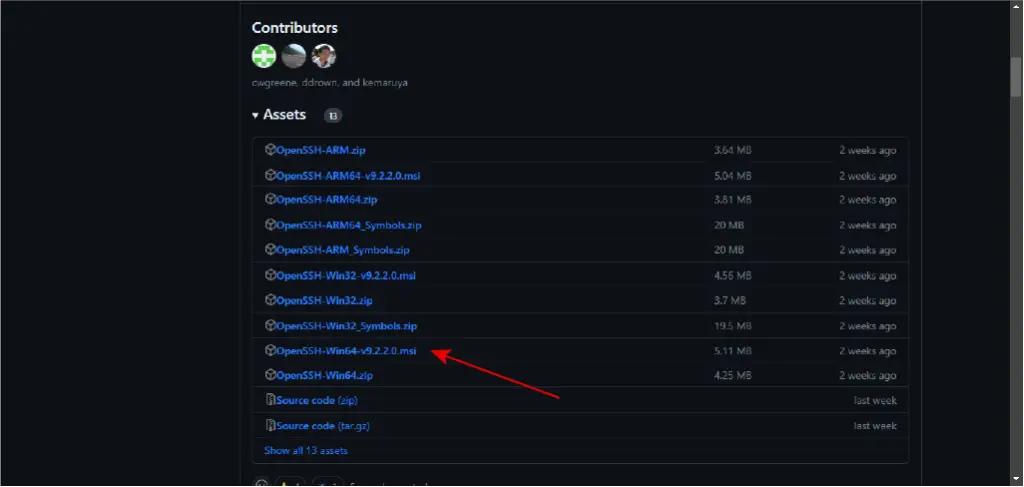
Choose OpenSSH-Win64 for a 64-bit operating system. After downloading the installer package, you can install it by double-clicking it. After installing
you can start using SSH in Windows PowerShell.
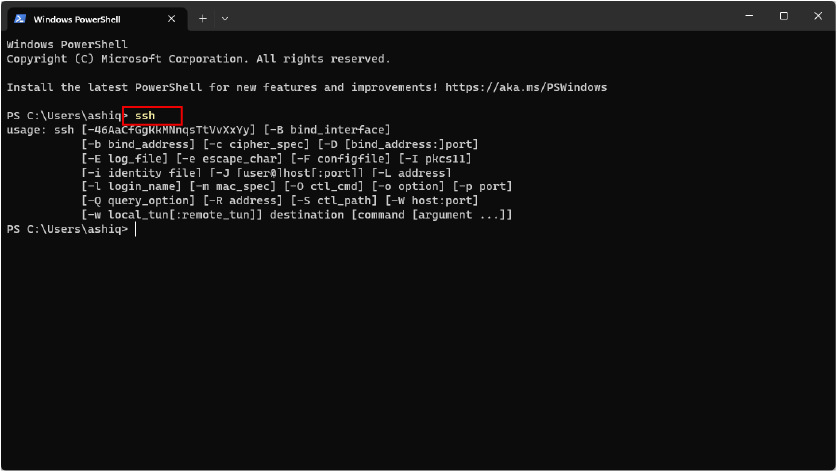
Configuring OpenSSH
You can configure OpenSSH on Windows Machine. There are two different configuring files for optimizing SSH connection. ssh_config file for optimizing SSH client is located in %USERPROFILE%\.ssh\config . You can open the configuration file with Notepad or Notepad++.
The server configuration file sshd_config is located in C:\ProgramData\ssh\sshd_config . You can also open this file in Notepad and Notepad++
2. Installing WSL in Powershell
Another way to use SSH in PowerShell is using SSH in WSL (Windows Subsystem for Linux). WSL is a compatibility layer for running Linux commands and applications on your Windows machine without using a virtual machine or Dual boot.
Before installing WSL on your Windows 10/11, ensure your system meets the minimum requirements.
- You are running Windows 10 version 1903 or later
- You have at least 4 GB of Ram
- You are using a 64-bit operating system
Install WSL2 on Windows 10/11
To install WSL on your Windows machine, open Windows PowerShell as administrator and enter the following command.
wsl --installThis command will install the latest version of Ubuntu on your Windows System. After installing WSL restart your computer to use WSL.
Install WSL With Specific Distribution
If you prefer Linux distribution, you have several options to choose from. To check available Linux distributions to choose from, enter the command in PowerShell.
wsl --list --onlineThis command will show you available Linux distributions you can install on your Windows system. WSL supports distributions such as Ubuntu, OpenSUSE, Kali, Debian, and Arch Linux.

wsl.exe --install -d <Distro>This command will install your preferred Linux Distribution. After installing the distribution restart the Windows to start using WSL.
Use SSH in WSL Powershell
To use SSH in WSL, open Powershell, type wsl , and hit enter to enter Linux Subsystem.
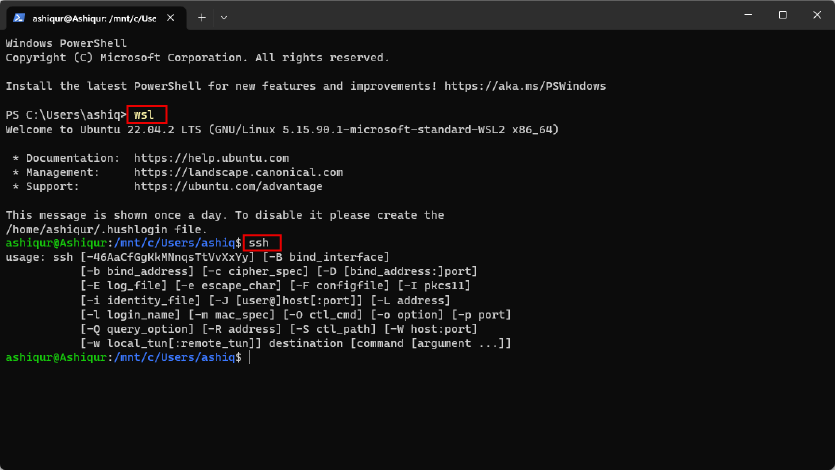
By default, OpenSSH is pre-installed in most distributions. But if OpenSSH is not installed in your distribution, you can install it easily.
For Ubuntu/Debian distribution, use the following command to install OpenSSH.
sudo apt-get update && sudo apt-get install openssh-serverFor Arch Linux, use the following command to install OpenSSH.
sudo pacman -Syu openssh Once you enter the subsystem, you can execute the Linux command in WSL. Use ssh the command to use OpenSSH within WSL.
3. Establishing a Connection with SSH
Once you have installed SSH in PowerShell with either one of these methods, you can establish SSH connection to your remote server. To connect to your remote server, you can use the command.
- Replace
userwith your username and example.com with your public IP address.
Then enter your password to establish the connection. If you have a public/Private key, you can connect your remote server without a password. For this, enter the command.
ssh -i keyfile [email protected]- Replace the key file with your key file location.
- Use your username and public IP address.
4. Basic SSH Commands in PowerShell
Now that you have established SSH connection, you can use these commands in PowerShell to maximize your output.
SSH
ssh command is used to establish a secure connection to a remote server. To connect your remote Linux server, you can use ssh followed by a username and IP address. For example, you can use this command
SCP
The scp command is used to copy files between local and remote servers securely. This command tool comes with OpenSSH you installed in the previous step. To copy a file, you can use the command scp followed by local_file, username, and Ip address. For example, you can use
scp local_file [email protected]For example, if you have a file name config.txt, and you want to copy this file to your remote server location /opt/application/, you can use the following command for this
scp config.txt [email protected]:~/opt/application/config.txtSSH-Keygen
The ssh-keygen command generates SSH key pair to connect to a remote server without a password. SSH keys are more secure than passwords as it is impossible to guess SSH keys. To generate an SSH key, just type
ssh-keygenThis command will create SSH public and private key pair. You can submit this key to a remote server to authenticate your SSH connection without a password.
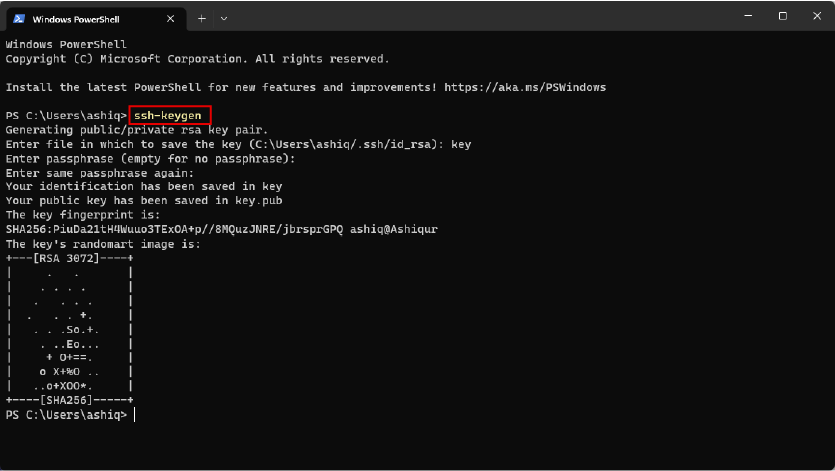
These are a few basic SSH commands. You can use more advanced SSH commands in Windows PowerShell.
Conclusion
SSH in PowerShell is an effective way to connect your remote Linux server using the Windows operating system. I have discussed two ways to use SSH in PowerShell. Downloading and Installing the OpenSSH installer is recommended for most users as it is natively integrated with Powershell. At the same time, WSL is a good option if you need other Linux commands and applications and an SSH connection in Powershell.



For the reason that the admin of this site is working, no uncertainty very quickly it will be renowned, due to its quality contents.
I’m glad you found the post helpful.