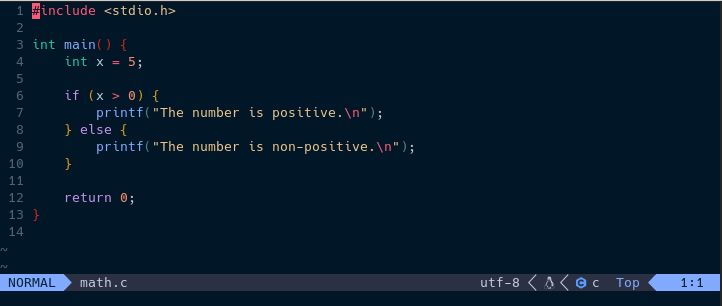
Syntax highlighting is an essential feature in modern code editors. It enhances readability and helps programmers understand programming languages better. By assigning different colors and styles to different elements of the code, developers can quickly identify keywords, variables, comments, and other important elements. Nvim-Treesitter is a Neovim plugin that implements syntax highlighting for different programming languages in Neovim.
In this blog post, I’ll show you how to set up and configure Nvim-Treesitter in Neovim. I will also demonstrate how you can add extensions to Treesitter to enhance its functionality.
Prerequisites
Before proceeding with the installation and usage of Nvim-Treesitter in Neovim, please make sure you have the following packages installed on your system:
Neovim
Nvim-Treesitter is a plugin for Neovim that sets syntax highlighting for different programming languages. Therefore, you must have Neovim installed to use Nvim-Treesitter. I assume that you have already installed Neovim.
Packer
Packer is a plugin manager for Neovim. You need Packer to install the Nvim-Treesitter plugin in Neovim. So, make sure Packer is installed in Neovim before installing Nvim-Treesitter on your system. If you haven’t installed Packer yet, consider installing Packer and follow the rest of the tutorial.
Installing Nvim-Treesitter
Before installing Nvim-Treesitter in Neovim, let’s take a look at the project structure. Please note that you can still follow this guide even if you have a different project structure. Just be careful when editing the configuration files.
~/.config/
└── nvim
    ├── init.lua
    └── lua
        ├── plugins.lua
        ├── treesitter.lua
        ├── .....
        └── other configuration files
To install the Nvim-Treesitter plugin, open the plugins.lua file using the following command:
nvim ~/.config/nvim/lua/plugins.luaIf your plugins file has a different name or is located in a different directory, open the file accordingly. After opening the plugins file, add the following lines to install Nvim-Treesitter:
-- treesitter configuration
use({
  "nvim-treesitter/nvim-treesitter",
  run = function()
    local ts_update = require("nvim-treesitter.install").update({ with_sync = true })
    ts_update()
  end,
})
Once you’ve added these lines to the plugins.lua file, save it using the :w command to install the plugins.
Configure Nvim-Treesitter
After installing the Nvim-Treesitter plugin, you need to create a configuration file for nvim-treesitter. In the configuration file, you can add syntax highlighting for supported languages.
Install Languages
To enable syntax highlighting for a programming language, you need to install the syntax highlighting for that language in Treesitter. To install a language, create a treesitter.lua file:
nvim ~/.config/nvim/lua/treesitter.luaAnd add the following configuration to the file:
-- import nvim-treesitter plugin safely
local status, treesitter = pcall(require, "nv

im-treesitter.configs")
if not status then
  return
end

-- configure treesitter
treesitter.setup({
  -- enable syntax highlighting
  highlight = {
    enable = true,
  },
  -- enable indentation
  indent = { enable = true },
  -- ensure these language parsers are installed
  ensure_installed = {
    "json",
    "javascript",
    "typescript",
    "yaml",
    "html",
    "css",
    "markdown",
    "markdown_inline",
    "bash",
    "lua",
    "vim"
  },
  -- auto install above language parsers
  auto_install = true,
})
Then save and close the file.
Please note that in this configuration file, I installed the following languages to Treesitter:
ensure_installed = {
  "json",
  "javascript",
  "typescript",
  "yaml",
  "html",
  "css",
  "markdown",
  "markdown_inline",
  "bash",
  "lua",
  "vim"
}
If you want to add a new language or remove a language that you don’t need, you can do so by adding or deleting entries from the language list. You can see the supported languages list here.
For example, if you want to enable syntax highlighting for “C” and “C++”, you should add the following entries to the list:
ensure_installed = {
  "c", -- Treesitter Parser for C
  "cpp", -- Treesitter Parser for C++
  "json",
  "javascript",
  "typescript",
  "yaml",
  "html",
  "css",
  "markdown",
  "markdown_inline",
  "bash",
  "lua",
  "vim",
  "dockerfile",
  "gitignore",
}
Adding Lualine to init.lua
To activate Treesitter, open the init.lua configuration file:
nvim ~/.config/nvim/init.luaThen add the following line to the bottom of the configuration file:
require('treesitter')Save and exit the editor to enable syntax highlighting.
Treesitter Extensions
Treesitter extensions enhance the functionality of the plugin. There are several Treesitter extensions that add extra features to Treesitter. Rainbow Delimiters, Treesitter Playground and Treesitter Autotag are the most useful ones.
Rainbow Delimiters for Neovim
This plugin is known as rainbow parentheses, which helps identify the different sections of code. If you are working with a programming language that involves a lot of parentheses, this plugin can save you a lot of extra work.

You can install this extension as a Neovim plugin with Packer. To install the nvim-ts-rainbow2 plugin, open the plugins.lua file and add the following line:
use("HiPhish/nvim-ts-rainbow2")After adding this plugin, open the Treesitter configuration file:
nvim ~/.config/nvim/lua/treesitter.luaThen add the following line between treesitter.setup({}) in the Treesitter configuration file:
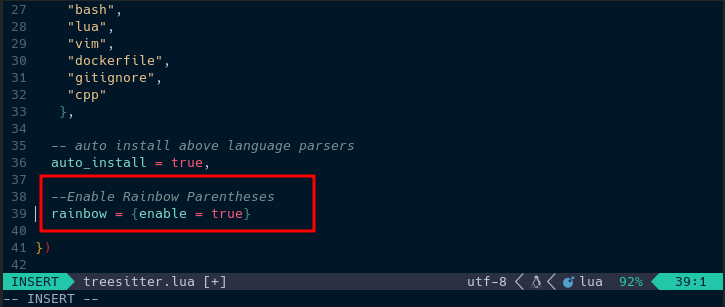
-- Enable Rainbow Parentheses
rainbow = { enable = true },
Save and exit the file to enable rainbow parentheses.
Neovim Treesitter Playground
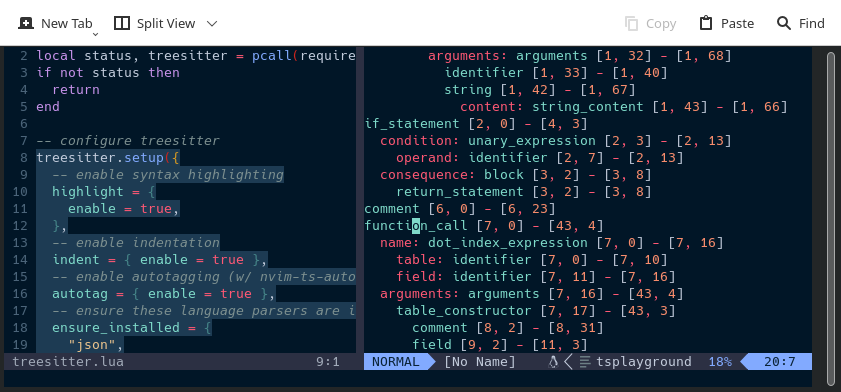
The Neovim Treesitter Playground enhances the experience of working with Treesitter by allowing you to interactively view the syntax trees generated by Trees
itter for your code. This playground environment enables you to observe how Treesitter breaks down the code into different elements and how it identifies the relationships between them.
You can install the Treesitter Playground extension as a Neovim plugin with Packer. To install the playground plugin, open the plugins.lua file and add the following line:
use("nvim-treesitter/playground")After adding this plugin, open the Treesitter configuration file:
nvim ~/.config/nvim/lua/treesitter.luaThen add the following line between treesitter.setup({}) in the Treesitter configuration file:
-- Enable Treesitter Playground
playground = { enable = true },
Save and exit the file to enable the Treesitter playground.
To open the playground, use the following command:
:TSPlaygroundToggle
Treesitter Autotag
The nvim-ts-autotag plugin is an extension for Treesitter that automatically inserts closing tags when you type the opening tag for HTML, XML, JSX, and similar languages. This feature saves you from manually typing the closing tag, reducing errors and improving productivity.
To install the Treesitter Autotag extension as a Neovim plugin with Packer, open the plugins.lua file and add the following line:
use("windwp/nvim-ts-autotag")After adding this plugin, open the Treesitter configuration file:
nvim ~/.config/nvim/lua/treesitter.luaThen add the following line between treesitter.setup({}) in the Treesitter configuration file:
-- Enable Autotag
autotag = { enable = true },
Save and exit the file to enable the Treesitter Autotag extension.
Conclusion
Treesitter is a powerful syntax highlighting plugin for Neovim. It can make your code visually appealing and enhance your code readability.
In this blog post, I have covered everything from basic installation to advanced extension integration with Treesitter. If you have any further questions or confusion, feel free to ask me in the comment section.


