Line numbering is a useful feature in Vim that helps you with navigating and editing files and code. It allows you to easily reference and locate specific lines in your documents.
In this blog post, I will show you how to enable line numbers in Vim, including the option to show relative numbers. I’ll also cover how to set line numbers as the default and how to customize the formatting.
Table of Contents
Show Line Numbers in Vim
Line numbers provide a convenient way to identify your location and quickly navigate to specific lines in Vim. Enabling line numbers is straightforward, and you can use the following commands:
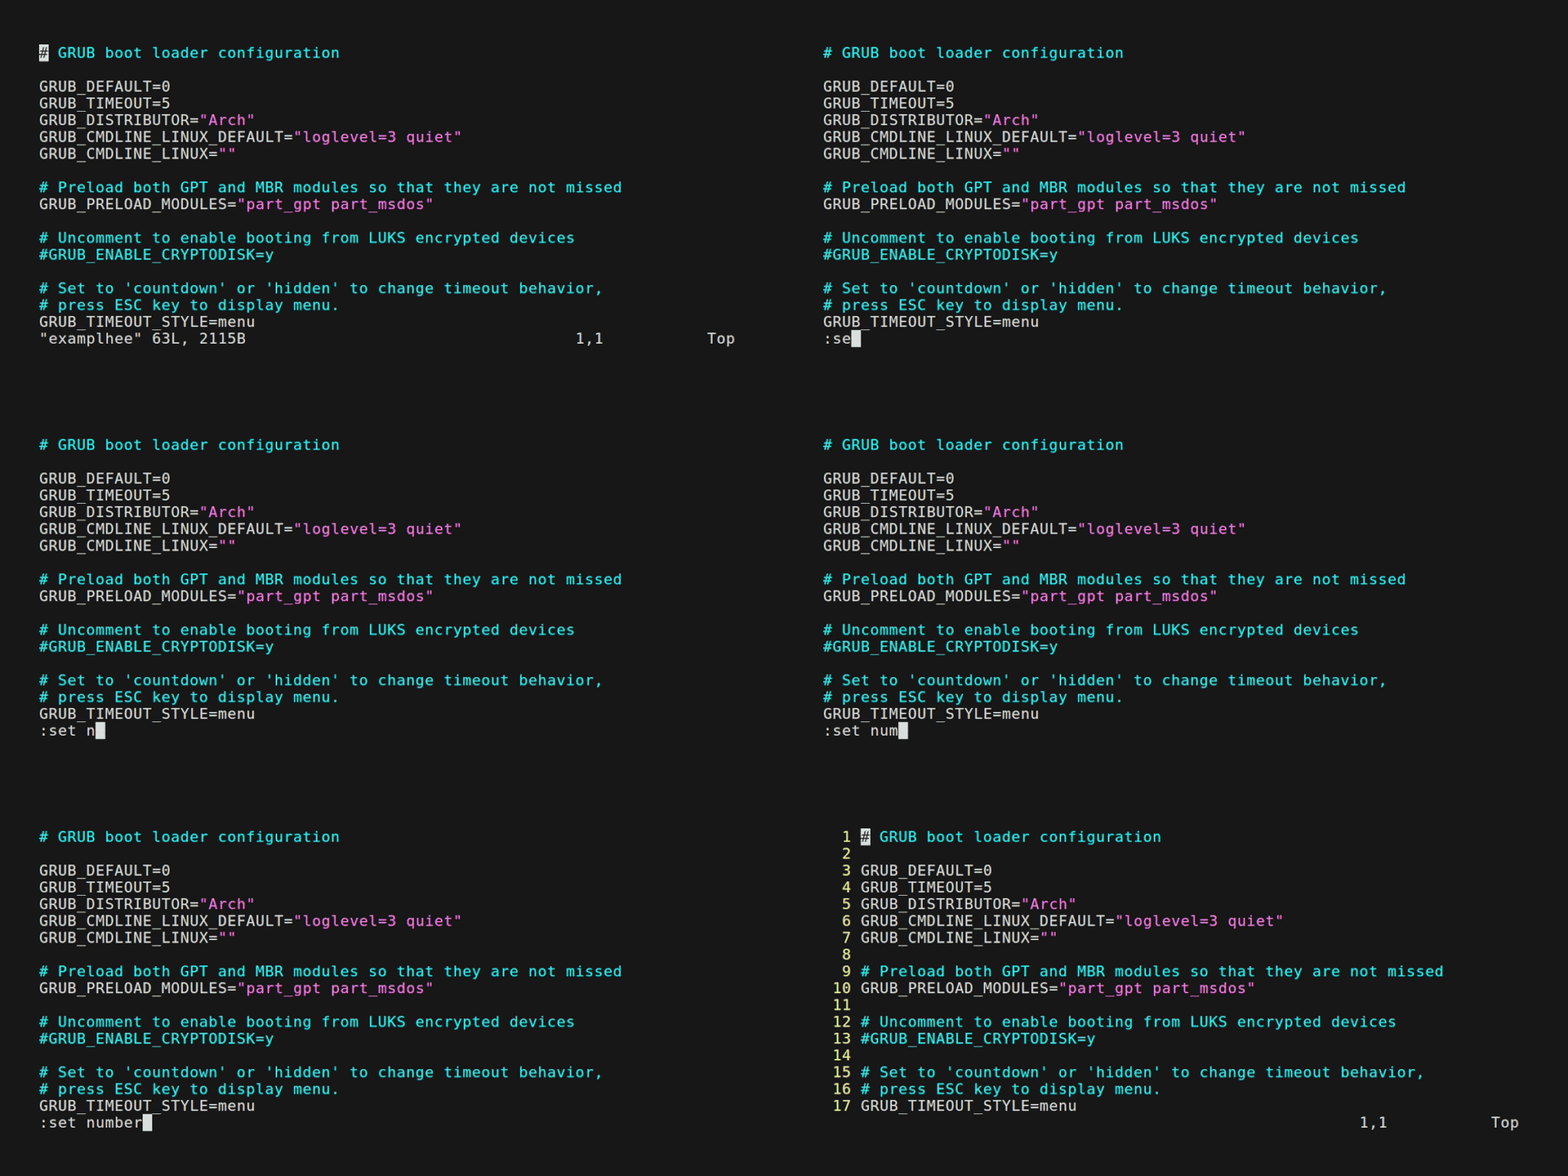
Using the :set number Command
To enable line numbers in Vim, use the :set number command. This will display line numbers in the left margin of the vim editor.
:set numberAfter executing this command, line numbers will be displayed next to each line in the file.

Using the :set nu Abbreviation
Alternatively, you can use the :set nu command, which is an abbreviation of :set number. This command enables line numbers more quickly.
:set nuThis command has the same function as :set number, enabling line numbers in the editor.
Disabling Line Numbers in Vim
While line numbers are helpful for navigation and editing in Vim, there may be situations where you prefer working without them. Disabling line numbers is straightforward, and you can use a single command:
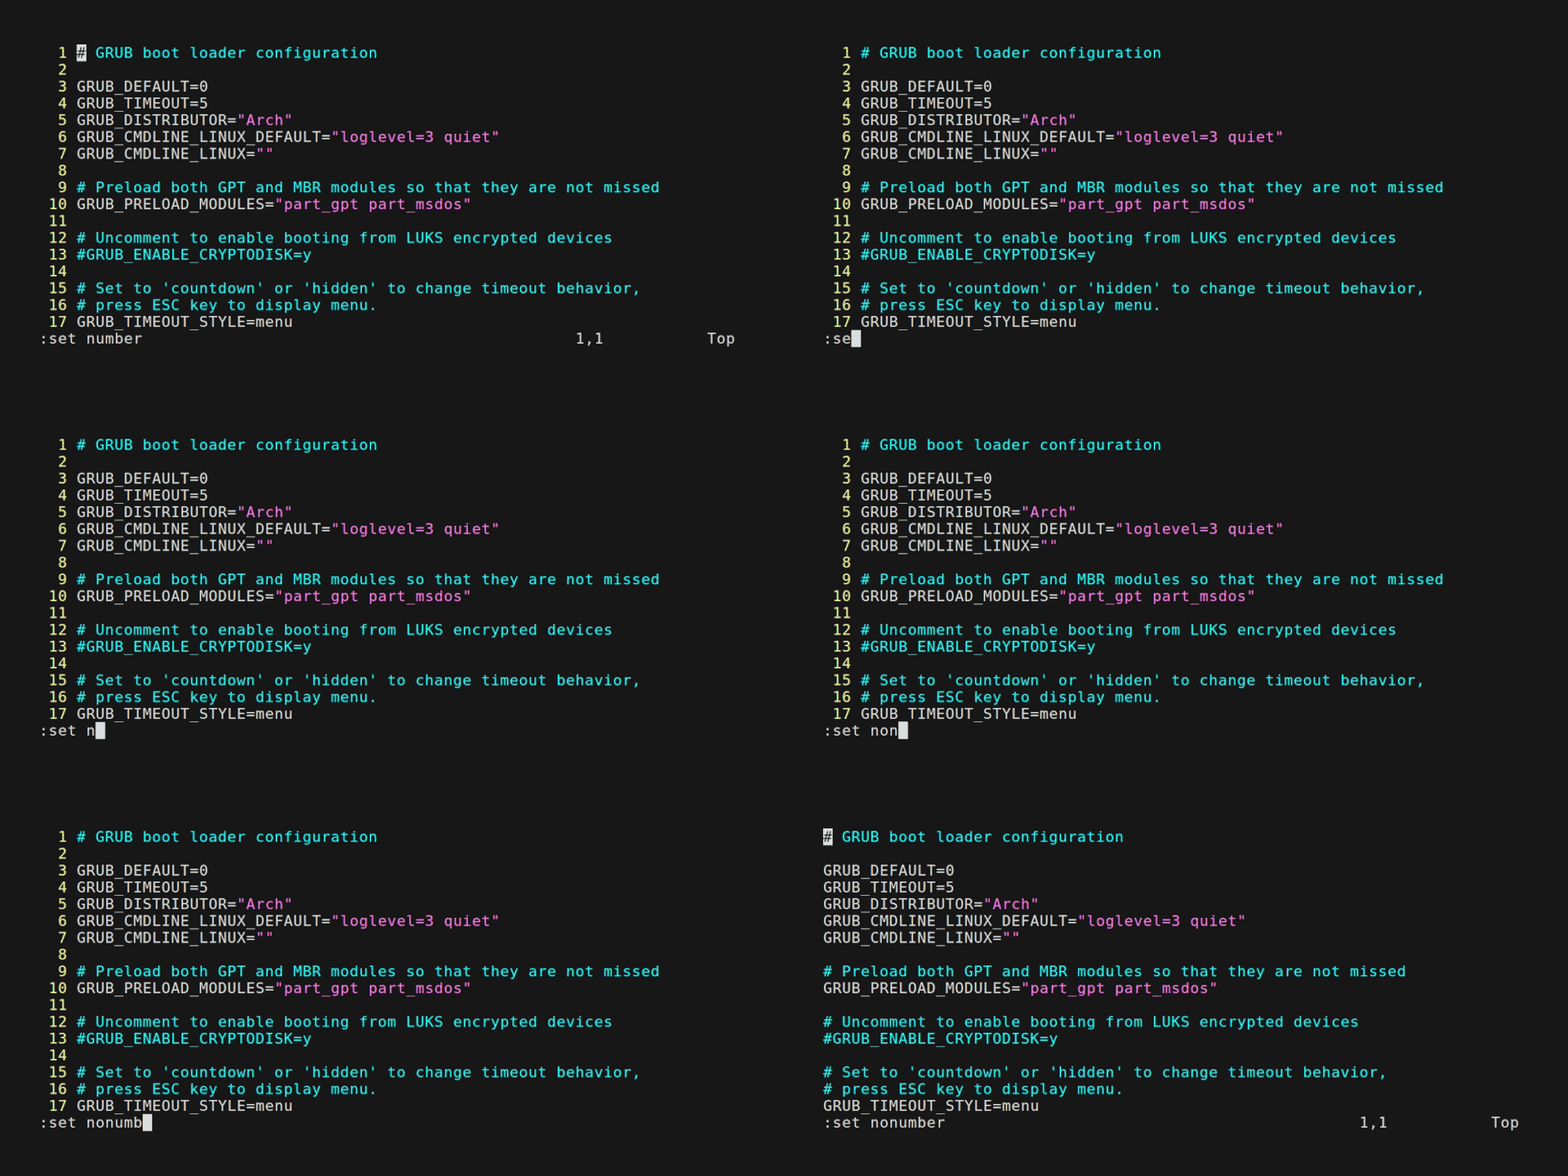
Using the :set nonumber Command
To disable line numbers in Vim, use the :set nonumber command. This will remove the line numbers from the left margin of the editor.
:set nonumberAfter executing this command, the line numbers will no longer be displayed in the editor.

Using the :set nonu Abbreviation
Alternatively, you can use the :set nonu command to disable line numbers. It serves as an abbreviation for :set nonumber.
:set nonuThis command functions the same as :set nonumber, removing the line numbers from the editor.
Show Line Numbers by Default
You can customize Vim’s settings to show line numbers by default instead of enabling them each time. To enable line numbers in your .vimrc configuration file, follow these steps:
Step 1: Locating the .vimrc File
The .vimrc configuration file controls the settings of the Vim editor and is usually located in your home directory at ~/.vimrc. You can edit the .vimrc file using the following command:
vim ~/.vimrcThis command opens the .vimrc file in Vim for editing. If the file doesn’t exist, Vim will create a new one.
Step 2: Adding Line Number Settings to .vimrc
To show line numbers by default, add the following line to your .vimrc file. You can include commands such as set number or set relativenumber along with any additional formatting options.
set numberSave the .vimrc file after making your modifications.

Step 3: Reloading .vimrc Changes
To apply the changes made to your .vimrc file without restarting Vim, you can use the :source command followed by the path to the .vimrc file.
:source ~/.vimrcThis command reloads the .vimrc file, applying any modifications you made.
Step 4: Verifying Line Number Settings
To confirm that your line number settings are working as expected, open a file in Vim and check if the line numbers are displayed according to your configured options.
Showing Relative Line Numbers
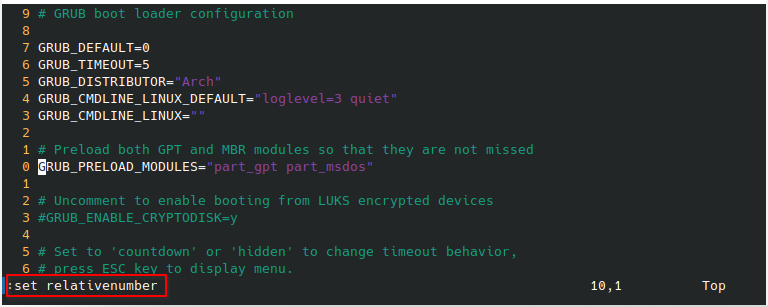
Additionally, Vim allows you to work with relative line numbers instead of absolute line numbers. Relative line numbers start counting from your current cursor position, both up and down. This feature is particularly useful when working with large documents.
Enabling Relative Line Numbers
To enable relative line numbers in Vim, use the :set relativenumber command.
:set relativenumberAfter executing this command, Vim will display relative numbers in the left margin of the editor.

Combining Relative and Absolute Line Numbers
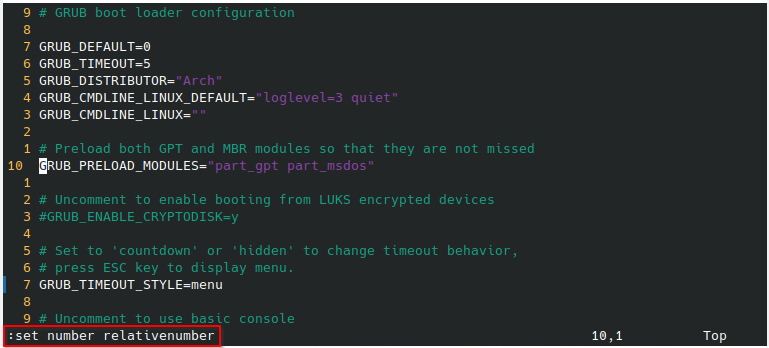
In some situations, you may need both relative and absolute line numbers. Vim allows you to show both types of line numbers simultaneously by combining the following command:
:set number relativenumberWith this configuration, Vim will display the current line with an absolute line number and show the remaining lines as relative line numbers.

Customizing Line Number Formatting
In addition to showing line numbers in Vim, you can customize the line number settings according to your preferences. You can adjust the line number width and change the line number format, which is helpful for working with different screen sizes.
Adjusting Line Number Width
By default, Vim uses a line number width of 5 spaces to separate line numbers from the main document. However, you have the option to define a custom numberwidth in the Vim editor. Use the :set numberwidth command to define it.
For example, if you want to use a 6-digit number width, you can use the following command:
:set numberwidth=6You can also change the default setting of the line number width by adding the command to your ~/.vimrc configuration file.
Conclusion
Now you have learned how to show line numbers in the Vim editor, including different options for relative numbers and customization. It’s time to practice using these options in your documents with Vim. Don’t forget to share your thoughts about this blog post.


