Neovim is a powerful and highly customizable terminal editor. It offers several pre-installed colorscheme and allows setting custom colorschemes as plugins. Choosing a suitable colorscheme enhances the visual appeal, readability, syntax highlighting, and overall coding experience within the editor.
In this blog post, I will show how to set the pre-installed colorscheme as well as a custom colorscheme using Neovim plugins. I will also address error handling associated with colorschemes.
Table of Contents
Enable True Color Terminal
Enabling true color terminal allows Neovim to utilize 24-bit RGB color values, providing a more extensive and accurate range of colors in the terminal. This enables colorschemes to have richer and more vibrant colors, enhancing the visual experience of your Neovim editor.
To activate true color terminal, open your options.lua file using the following command:
nvim ~/.config/nvim/lua/options.luaThen, add the following line to the file and save it:
vim.opt.termguicolors = trueIf you don’t have an options.lua file, you can use the init.lua file to activate true color terminal. Open your init.lua file using the command:
nvim ~/.config/nvim/init.luaThen, add the following line to the file and save it:
vim.opt.termguicolors = trueSetting Neovim’s Pre-installed Colorscheme
Neovim offers several pre-installed colorschemes that can be used without installing any additional plugins. Here is a list of the pre-installed colorschemes available in Neovim:
| Colorscheme | Description |
|---|---|
| blue | A colorscheme with shades of blue |
| darkblue | A dark blue-themed colorscheme |
| default | The default colorscheme |
| delek | A colorscheme with a dark background and bold text |
| desert | A desert-inspired colorscheme |
| elflord | A fantasy-themed colorscheme |
| evening | A colorscheme with a calming evening vibe |
| habamax | A colorscheme with warm hues |
| industry | A colorscheme with an industrial look |
| koehler | A professional-looking colorscheme |
| Lunaperche | A unique and visually pleasing colorscheme |
| morning | A colorscheme that represents the morning |
| murphy | A clean and minimalist colorscheme |
| pablo | A vibrant colorscheme |
| peachpuff | A soft and warm colorscheme |
| quiet | A subdued and relaxing colorscheme |
| ron | A balanced and harmonious colorscheme |
| shine | A shiny and glossy colorscheme |
| slate | A colorscheme with shades of slate |
| torte | A rich and chocolatey colorscheme |
| zellner | A unique and eye-catching colorscheme |
You can set any of these colorschemes using a simple Vim script. To set a colorscheme in Neovim, open any file with Neovim and enter the following command:
:colorscheme Then press Tab to browse the default colorschemes and choose one by pressing Enter.
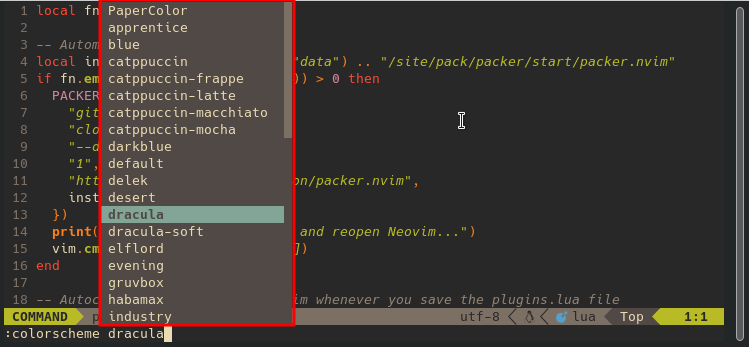
Alternatively, you can specify the colorscheme name directly in the command. For example, if you want to set the ron colorscheme, use the following command:
:colorscheme ron???? Setting the colorscheme in this way is not persistent, meaning that Neovim will not remember the previous colorscheme when you open a new file.
Setting Neovim’s Colorscheme Persistently
If you want to persistently set the colorscheme, you can use a Vim script in your init.lua file. To set the colorscheme, open your init.lua file using the following command:
nvim ~/.config/nvim/init.luaThen, add the following Vim script to the file:
vim.cmd 'colorscheme ron'Replace ‘ron‘ with your desired colorscheme, and save and quit the file. Now, whenever you open any file with Neovim, you will see your desired colorscheme has applied.
Setting a Custom Colorscheme in Neovim
While Neovim comes with several appealing pre-installed colorschemes, there are many more custom colorschemes available as Neovim plugins. To install a custom colorscheme as a plugin, you can use a package manager like Packer.
???? If you haven’t set up Packer in Neovim, consider installing Packer in Neovim before proceeding with installing any custom colorschemes.
Installing a Colorscheme
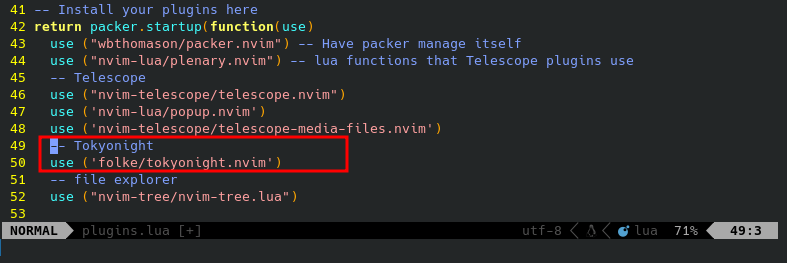
For example, let’s say you want to use the popular colorscheme called tokyonight.nvim. Before using this theme, you need to install it as a Neovim plugin. Open your plugins.lua file using the command:
nvim ~/.config/nvim/lua/plugins.luaThen, add the following line to install tokyonight:
use ('folke/tokyonight.nvim')Save the file using the :w command to install the plugin. Alternatively, you can use :PackerInstall to install the plugin.
Setting the Colorscheme
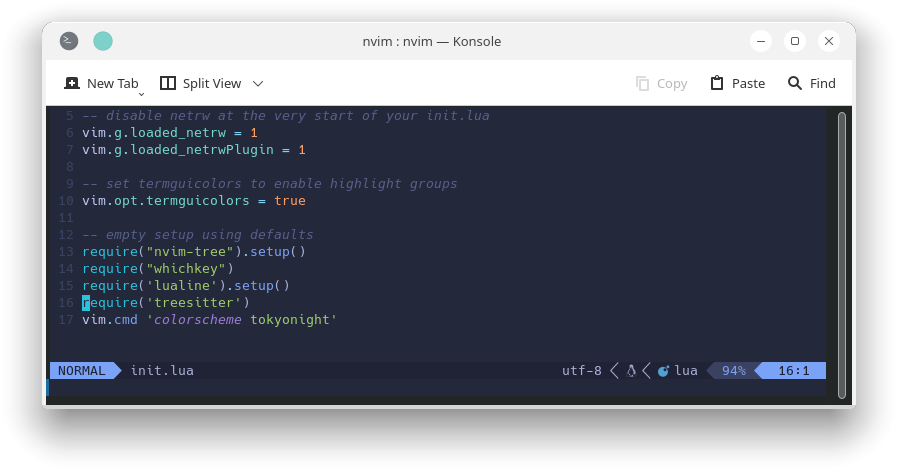
Once you have installed the colorscheme as a plugin, you can set it just like the pre-installed colorschemes. Open your init.lua file using the command:
nvim ~/.config/nvim/init.luaThen, add the following line to activate the colorscheme:
vim.cmd 'colorscheme tokyonight'Save the file and quit the init.lua file. Now, when you open Neovim, you will see it with the new colorscheme.
Error Handling
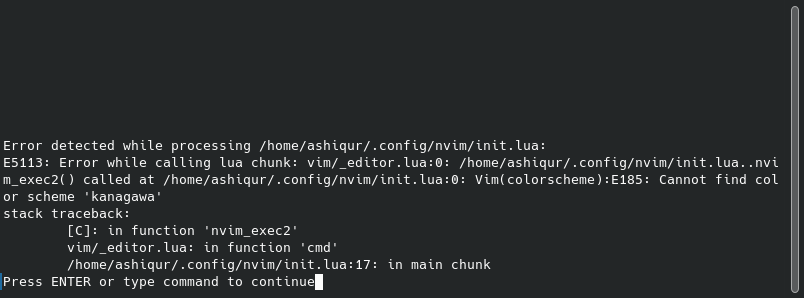
If you accidentally remove a theme folder or make a typo in the colorscheme name, you may encounter an error message every time you open Neovim. This can be quite annoying. To avoid this, you can use a protected call to activate the colorscheme. In case the colorscheme doesn’t exist, you won’t receive an error message like this:
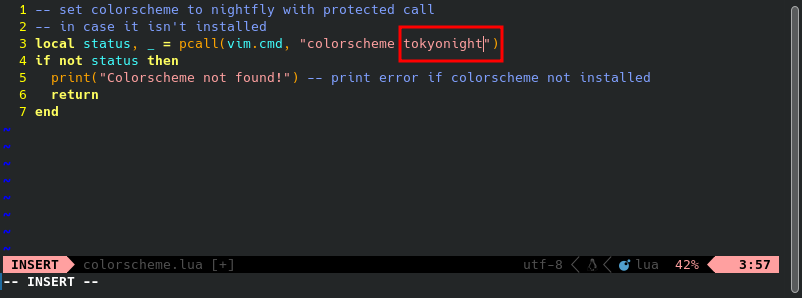
To use a protected call, create a new file called colorscheme.lua:
nvim ~/.config/nvim/lua/colorscheme.luaAdd the following configuration to the file:
-- Set the colorscheme to tokyonight using a protected call
-- in case it isn't installed
local status, _ = pcall(vim.cmd, "colorscheme tokyonight")
if not status then


 print("Colorscheme not found!") -- Print an error message if the colorscheme is not installed
  return
end
Replace ‘tokyonight‘ with your desired colorscheme, and save the file.
Now, open your init.lua file:
nvim ~/.config/nvim/init.luaThen, add the following line and save the file:
require ('colorscheme')This way, you won’t encounter an error message even if the colorscheme doesn’t exist.
Conclusion
Choosing a colorscheme allows you to personalize your terminal with your favorite colors. Setting the colorscheme is one of the fundamental aspects of Neovim customization. In this blog post, I have shown you how to set colorschemes in Neovim, from the basic pre-installed options to advanced custom configurations. I have also demonstrated how to handle errors related to missing colorschemes. If you have any further questions or need clarification, please let me know in the comment section.


I have init.vim, not init.lua and it doesn’t like when I add an init.lua alongisde my init.vim.